Don’t invest unless you’re prepared to lose all the money you invest. This is a high-risk investment and you are unlikely to be protected if something goes wrong. Take 2 minutes to learn more
Created by software developer Changpeng Zhao, Binance is now one of the world’s largest cryptocurrency exchanges, in terms of trading volume. Although the platform is well-known for facilitating cryptocurrency transactions, you can now trade futures with leveraged positions with ease via Binance Futures.
Our Crypto Signals
1-month subscription
 Up to 5 signals daily
76% success rate
Entry, take profit & stop loss
Amount to risk per trade
Risk reward ratio
Up to 5 signals daily
76% success rate
Entry, take profit & stop loss
Amount to risk per trade
Risk reward ratiomonth
3-month subscription
Up to 5 signals daily
76% success rate
Entry, take profit & stop loss
Amount to risk per trade
Risk reward ratiomonth
 Most popular
6-month subscription
 Up to 5 signals daily
76% success rate
Entry, take profit & stop loss
Amount to risk per trade
Risk reward ratio
Up to 5 signals daily
76% success rate
Entry, take profit & stop loss
Amount to risk per trade
Risk reward ratiomonth
12-month subscription
Up to 5 signals daily
76% success rate
Entry, take profit & stop loss
Amount to risk per trade
Risk reward ratiomonth
Lifetime Subscription
Up to 5 signals daily
76% success rate
Entry, take profit & stop loss
Amount to risk per trade
Risk reward ratio1-month subscription
Up to 5 signals daily
76% success rate
Entry, take profit & stop loss
Amount to risk per trade
Risk reward ratiomonth
3-month subscription
Up to 5 signals daily
76% success rate
Entry, take profit & stop loss
Amount to risk per trade
Risk reward ratiomonth
Most popular
6-month subscription
Up to 5 signals daily
76% success rate
Entry, take profit & stop loss
Amount to risk per trade
Risk reward ratiomonth
12-month subscription
Up to 5 signals daily
76% success rate
Entry, take profit & stop loss
Amount to risk per trade
Risk reward ratiomonth
Lifetime Subscription
Up to 5 signals daily
76% success rate
Entry, take profit & stop loss
Amount to risk per trade
Risk reward ratioToday we talk about how to trade Binance Futures.
In this guide, we cover how to open an account and navigate the platform. We also talk about the various order types you can use and additional order instructions.
Opening a Binance Futures Account in 7 Steps
Before you can learn how to trade Binance futures, you need an account. See a 7 step walkthrough below.
- Step 1: Head over to Binance and open a regular account – if you already have one you can skip to step 4.
- Step 2: For those who are new to the platform, click ‘register’ and fill in your name address, email, and a memorable password
- Step 3: Check all the information is correct and click ‘Create an Account’ – you will receive email confirmation shortly after
- Step 4: Log in to your Binance account, click ‘Derivatives’, followed by ‘USD (S)-M Futures’
- Step 5: A box will appear, click ‘Open Now’ to initiate your Binance futures account
- Step 6: If you haven’t already – deposit funds into your Binance Account wallet to transfer to your Futures wallet
- Step 7: You are now ready to trade
Now that you have opened the relevant accounts needed, you can look at how to trade Binance futures. When it comes to making a deposit, you shouldn’t have any issues. The platform is easy to navigate, and you can fund your trades using crypto or fiat currencies. Next, we talk about how to navigate the interface.
Navigating the Binance Futures Interface
Once you have an account set up you can trade Binance futures. To get the ball rolling, we have included a quick guide to navigating the platform’s interface.
Main Menu
There are heaps of links in the main menu area of the Binance Futures interface. This includes ‘Activities’, ‘Spot’, ‘COIN-M Futures’, and ‘API Access’.

Price Chart
When you are ready to trade Binance futures, you will find heaps of useful information in the price chart area. You can select a contract very easily by lingering over the current contract. Please note that by default the name of the futures contract will be ‘BTCUSDT’.
You will also be able to monitor the ‘Mark Price’ and predicted funding rate here. When checking in on your chart, you can click ‘Depth’ to reveal the depth of the present order book. Moreover, you can easily swap between the built in TradingView chart, or the original.
If you would like to customize the precision of the live order book by clicking on the drop-down menu stating ‘0.01’ – you can see this on your top right. Notably, if there is an arrow in the corner of your chart, this means you can customize the interface to suit you.
Trading Activity Panel
The trading activity panel will be valuable when getting to grips with how to trade Binance futures. You can keep an eye on your trading activities by accessing all transactions and trading history from within a specific timeframe. This means you can you can chop and change between viewing historical orders and existing ones.
Another thing to monitor is where you stand in the auto-deleverage queue. This is especially the case when the markets are experiencing extreme volatility, as it could see your account liquidated. We briefly explain auto-deleverage shortly, for anyone in the dark.
Margin Overview
When learning how to trade Binance futures, you will need to head over to the margin overview area of your account frequently. Here you can buy digital currencies, see what other assets are available, and make a deposit.
You can also study all of your current positions and contracts, and avoid liquidation by checking the all-important ‘margin ratio’ on a regular basis. To transfer trading funds between your Binance account and Futures – simply click ‘Transfer’.
Order Entry Field
As the name suggests, this is the area you will use to place orders to trade Binance futures. As well as the heaps of order options, you may also modify your leverage and convert between an isolated and cross margin.
For any newbies, we cover order types and how to alter your leverage next.
Binance Futures Order Types
If you have traded contracts and such before, you can likely skip this part. However, for anyone who hasn’t, we cover each element below.
Market and Limit Orders
Place a ‘market order’ when you want your trade to be actioned immediately. The price you get will be the current or next best price. Because you are placing an order that is matched with a pre-existing one, you will pay a small fee for this order.
A ‘limit-order’ should be used if you want to enter your trade at a specific price – albeit above or below its current value. When or if the market hits your pre-defined price point – your order is executed.
Stop-Limit and Stop-Market Orders
When placing a ‘stop-limit’ order, you are setting a specific price for both limit and stop. If going long, the stop-limit will be placed above the market value, if you are looking to go short, you will set it below.
- Let’s say you are trading Bitcoin futures, currently valued at $44,000
- You might set your stop-limit to buy at $46,600 and the limit to $47,880
- If BTC rises beyond the $46,600 stop value, the position will be actioned and switched to a limit order
- As long as this trade can be actioned below the limit price of $47,880 – the order is executed
Note if you were short on Bitcoin the stop-limit order goes below the market value
A ‘stop-market’ order works in the same way, only when the stop price has been achieved a market order is executed instead.
Take Profit Limit and Market Orders
Take-profit limit order works in the same way as the aforementioned stop-limit order – only the opposite. When the take-profit price point is reached, it activates the order and limit price. In a nutshell, this order locks in your profit.

Trailing Stop Order
A trailing stop order is another way to manage your risk, particularly in day trading. Decide specifically how much you are prepared to lose on a position and set the maximum price. Doing this based on a percentage is the easiest way to calculate.
If the asset increases, or decreases at odds with your prediction – the stop will remain how it is. If on the other hand the market in question falls in your favor – the stop price will move in parallel with it.
How to Manually Adjust Leverage
When you are learning the ins and outs of how to trade Binance futures, you will probably need to adjust your leverage from time to time. Binance set the default to 1:20, meaning you can boost your stake 20 times.
The lower your stake is, the more leverage you will be offered. To access this information and change the leverage used, press ‘Current Leverage’. Always use leverage with caution. If the trade doesn’t go the way you expected, you will finish in the red and could face liquidation.
Binance Futures Jargon Explained
To help you understand how to trade Binance futures, we have listed a few examples of common terminology used, with a brief explainer.
Mark Price and Last Price
When you are looking to trade Binance futures, you will see ‘mark price’ and ‘last price’ mentioned.
To clear the mist, let’s explain both:
- Mark Price: Calculated based on your unrealized PnL (Profit and Loss), the ‘mark price’ represents an estimate of your position. This type of valuation is used to stop exploitation and manipulation.
- Last Price: Put simply, the ‘last price’ is the contract’s previous price. You can see this easily by looking at your transaction and order history. You can also use this information to work out your PnL.
We covered stop-limit and stop-market orders earlier, you can use either the mark price or the last price when placing this type of order by clicking ‘Trigger’ in the order.
Auto-deleveraging
Generally, an insurance fund will be drawn on to cover your account if it falls below 0. However, sometimes your position value may need to be lowered to cover this.
If you find yourself in the queue on ADL, it’s probable that the market is experiencing extreme volatility and the insurance fund alone can’t cover it.
The higher your leverage and success rate, the closer to the top of the list you will be. Check where you stand by clicking ‘ADL’ on your account.
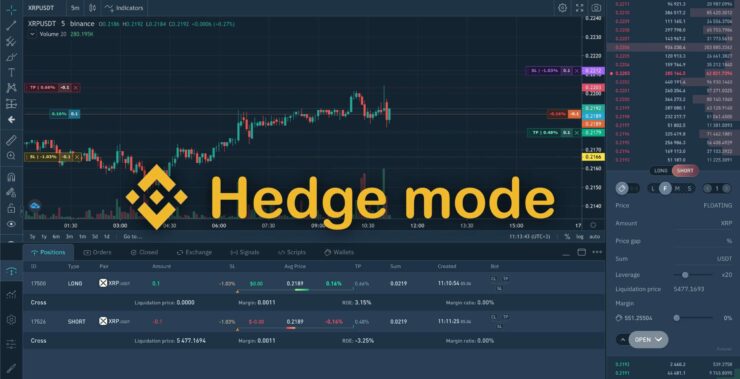
Hedge Mode
Put simply, if you want to open several trades using Binance futures, you will probably use ‘hedge mode’. This enables you to go long and short at the same time on the same contract. This goes some way to protecting you from a sudden adverse move in the crypto markets.
Additional Order Instructions
When placing limit orders you can add extra instructions – see below for a brief explanation of each.
Post-Only
Strating with the most simple instruction – Post-Only. If you select this, Binance futures will only post your position when it can be added to the order book.
This means that you only need to pay the ‘maker fee’. For those unaware, a ‘maker’ is someone who trades based on the future. A ‘taker’ is someone who creates orders to be carried out straight away.
Time in Force (TIF)
Again, this order goes hand in hand with limit orders. As the name suggests ‘TIF’ (Time in Force) enables you to be specific about how long your position remains in place until it expires or is actioned.
When given the opportunity to add the TIF order condition, you will see these additional options:
- FOK (Fill Or Kill): This tells the platform that you want for the position to be executed instantly, or not at all
- IOC (Immediate Or Cancel): If you select IOC, the position is executed immediately. If it is only actioned in part, the platform cancel the rest of the order.
- GTC (Good Till Cancel): The position will stay as it is until you either cancel it or it is executed
If you don’t want to increase any existing positions, trade in one-way mode and select ‘Reduce-Only’.
Operating the Binance Futures Calculator
Every entry field on your Binance futures order will include a calculator. This means you will can easily calculate your stop-loss and take-profit values.
See what each tab of the calculator means below:
- Target Price: This is used to work out what value to exit your trade in order to make the returns you are looking for
- PNL: This can be used to work out your profit and loss (PnL), Return on Equity (ROE) and margin. This will be formulated based on your planned trade size, as well as the entry and exit value
- Liquidation Price: You can work out your predicted liquidation price. This is formed upon your planned entry and exit value, as well as your wallet balance
You can easily use the Binance futures calculator in conjunction with the leverage slider – to work out your entry into and exit from the market.
When to be Warey of Liquidation
Any changes in your ‘margin balance’ should prompt you to keep an eye on the situation. If your balance decreases beyond the minimum needed to hold your trade open – you could face liquidation.
This is called a maintenance margin and will depend on the value of your position. If you opt for ‘isolated margin’ mode, Binance allot the aforementioned balance to all separate trades. Whereas, if you utilize ‘cross margin’, the balance is spread between all positions.
Importantly, you will have your account liquidated if your margin ratio hits 100%. At this point every position will be automatically closed. You may also close a position manually if you fear this is close to happening.
How to Trade Binance Futures: The Bottom Line
Derivative financial instruments like futures are intimidating to most newbie traders. Before you can truly learn how to trade Binance futures, it’s important to familiarize yourself with the ins and outs of what this type of contract entails.
Binance offers a free testdrive to let you practice without risking your capital right away. There are a variety of orders you can utilize here, and you may also add additional instructions by using FOK, IOC, or GTC.