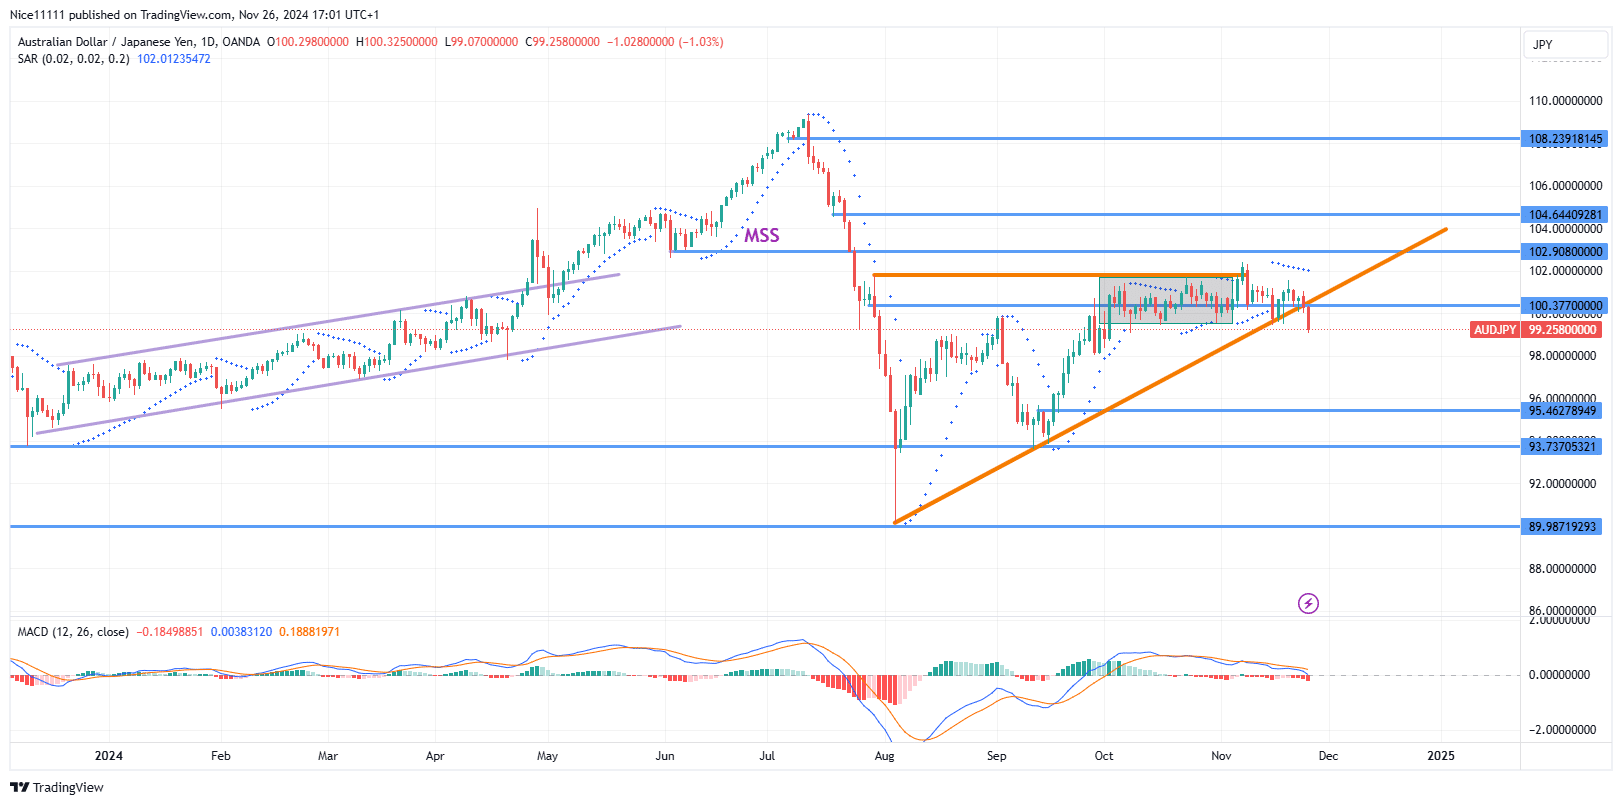
AUDJPY bulls have faced persistent resistance at the 100.370 bearish order block. The bullish trendline, anticipated to support a breakthrough, has failed to hold. The price now signals the potential for a deeper decline, breaking the prior bullish structure.
AUDJPY Key Levels
Demand Levels: 95.460, 93.740, 89.990
Supply Levels: 100.380, 102.910, 104.640
AUDJPY Long-Term Trend: Ranging
The long-term trend remains largely sideways, as resistance at 100.380 has dominated price action. The initial test of the bearish order block caused a sharp rejection, pushing the price lower. AUDJPY entered a consolidation phase during a second retest, which lasted through October.
While consolidating, the price hovered near 100.380, supported by the bullish trendline. However, recent developments saw the price fall below this level. The subsequent retest of the trendline led to a decisive break, as the price pierced through with little resistance.
Indicators confirm bearish sentiment. The MACD shows overbought conditions, with red histogram bars and a bearish crossover of the MACD and signal lines above zero. Similarly, the Parabolic SAR places reversal points above the daily candles, reinforcing expectations of further downside.
AUDJPY Short-Term Trend: Bearish
In the short term, the market has transitioned into a bearish trend. On the 4-hour chart, lower highs and lower lows characterize the structure. A bearish trendline has also formed, offering a clear framework for identifying safe entry points to generate forex signals to short the market. With the trendline breach and bearish indicators aligning, AUDJPY appears poised for further declines.
Trade on MT4 with Leverage up to 1:500! Trade on MT4 with Leverage up to 1:500!
X
We use cookies to ensure that we give you the best experience on our website. If you continue to use this site we will assume that you are happy with it.
 AUDJPY Short-Term Trend: Bearish
 AUDJPY Short-Term Trend: Bearish