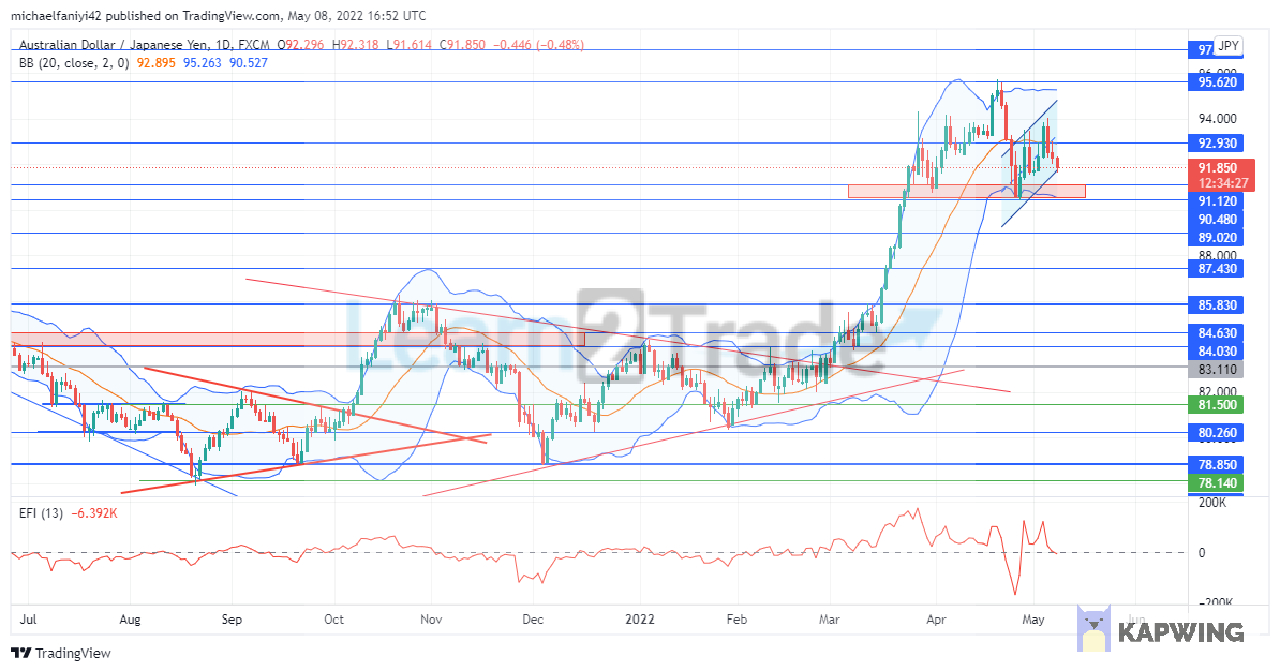
AUDJPY begins consolidating above the 91.120 order block after its bullish momentum has finally been suppressed at the 95.620 resistance level. The price attained the resistance level of 95.620 on the 20th of April 2022 and immediately received a blow that left the market spiraling downwards. It took the order block at 91.120 to keep the price afloat. Price is now attempting another rise to the 95.620 level from this level.
AUDJPY Key Zones
Resistance Levels: 95.620, 92.930 Support Levels: 91.120, 90.480
AUDJPY Long Term Trend: Ranging
The price broke out of its former resistance level at 85.830 and surged up 10% with consecutive bullish candlesticks. Immediately afterward, the market weakened and begins a retracement which peaked at the 91.120 order block. AUDJPY then climbs upward from there, leveraging the 92.930 key level for support to go higher. This led to the price reaching a market high of 95.620.
Subsequently, the market was deflated such that it dipped strongly back to the 91.120 order block, where it received support. The lower line of the Bollinger Band also adds extra support to create a solid base at 91.120. However, the EFI (Elders Force Index) suggests the bears are gaining more influence in the market, thus limiting the bullish fervor in the market to a consolidation.
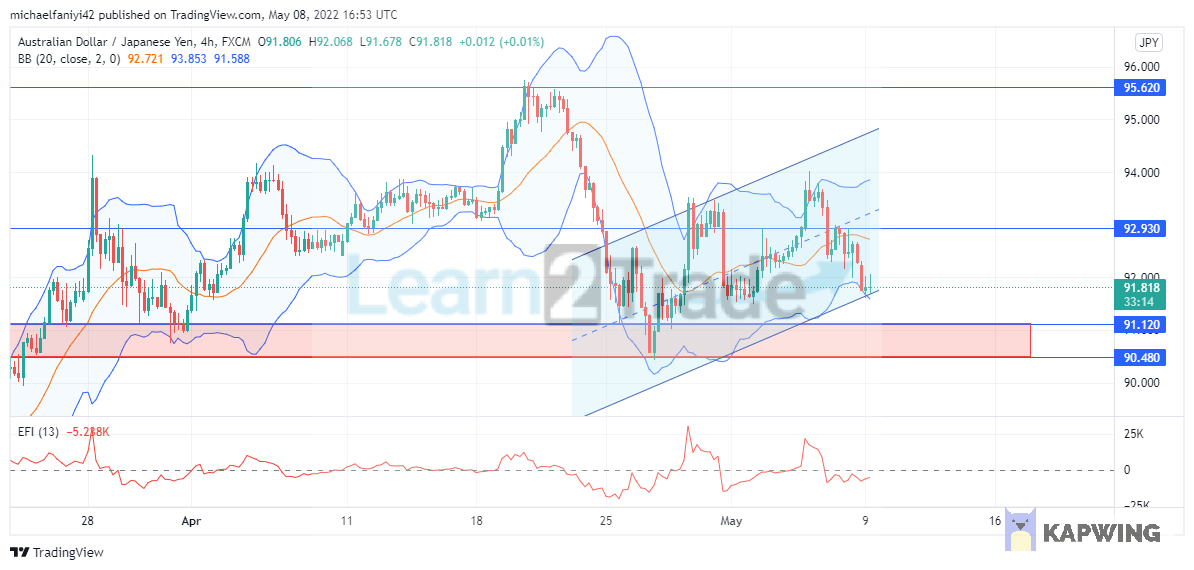
AUDJPY Short Term Trend: Bearish
On the 4-hour chart, the price shows an upward trending direction as it makes consistent higher highs. This shows that bears have finally gotten a handle on the market and the market begins consolidating. The ranging movement of the price sees it vacillating between the upper and lower Bollinger Bands. In this lower time frame, the EFI power line has dropped to a negative value but is expected to recover as AUDJPY aims for 95.620.
Note:Learn2.trade is not a financial advisor. Do your research before investing your funds in any financial asset or presented product or event. We are not responsible for your investing results.
Trade on MT4 with Leverage up to 1:500! Trade on MT4 with Leverage up to 1:500!
X
We use cookies to ensure that we give you the best experience on our website. If you continue to use this site we will assume that you are happy with it.